

How to Add Subtitles in Windows Media Player
While Microsoft has introduced a new media player app dubbed Movies & TV with Windows 10, it still includes the age old Windows Media Histrion. Information technology'south a wise motility, considering there are a number of people who still utilize the Windows Media Role player for its simplicity. While Windows Media Player is great when information technology comes to handling simple media playing tasks, chances are, yous are hither because you haven't been able to add together external subtitles to videos in the application.
If you explore the spider web, you will find various ways that merits to set up subtitle addition in Windows Media Player, however, in our feel, most of those means don't really piece of work. Well, the expert news is, we tried unlike options and we did manage to add subtitles in Windows Media Player. And then, without further ado, here'south how to add subtitles in Windows Media Histrion:
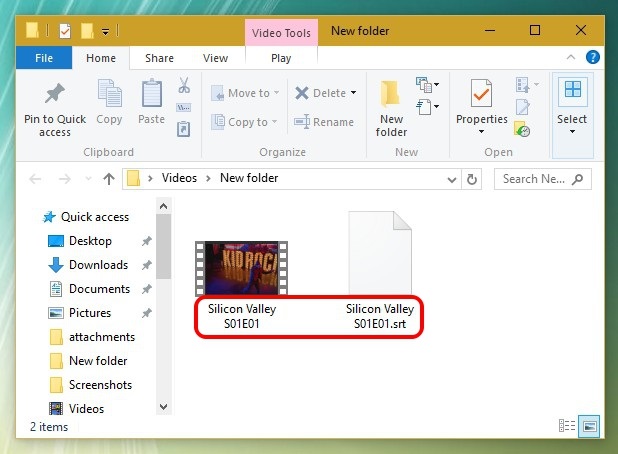
1. The first step is to make certain that the video file and its subtitle file feature the exact same name. Windows Media Player does not let yous add subtitles manually and it simply detects the subtitles when they accept the same name every bit the video.
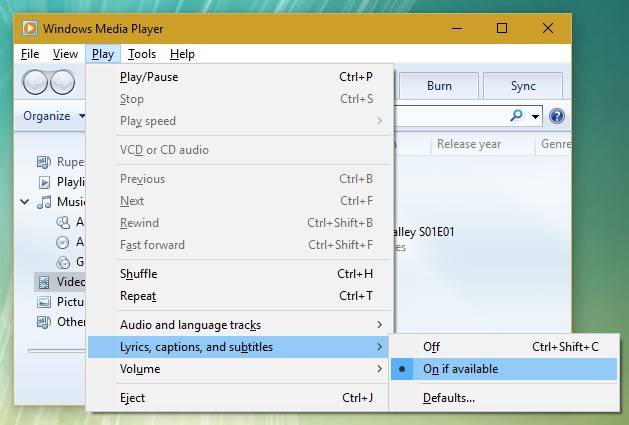
two. One time done, open Windows Media Actor and in the Library Mode, go to Play->Lyrics, captions, and subtitles and click on "On if bachelor". You can also find this option in the Now Playing Mode by right clicking on the top.
3. And so, download the DirectVobSub (VSFilter) codec and install it on your PC. It'due south bachelor for both 32-bit and 64-bit machines. You but demand to install the codec and in that location's no demand to configure anything. Make sure to download the codec from the official website, equally people have reported of information technology packing malware when downloaded from other sources.
Note : Some users report that subtitles started working after these steps, so you should play a video and check if subtitles are working in Windows Media Player. If not, simply follow the steps beneath.
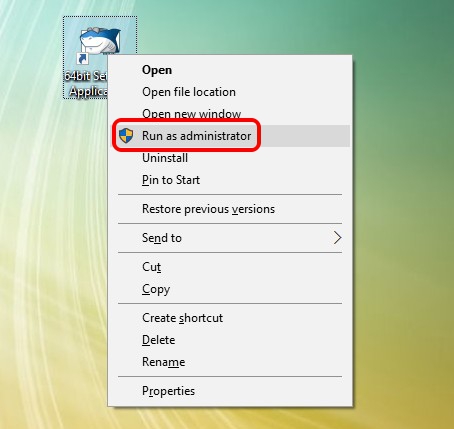
4. Once washed, y'all will take to download and install Shark007's Advanced codec for Windows Media Player. After it's installed, open the 64bit Settings Awarding or 32bit Settings Application (Yes, that's what information technology's named), depending on your PC. You lot will take to launch it with administrator rights by right clicking on the application and clicking "Run as Administrator".
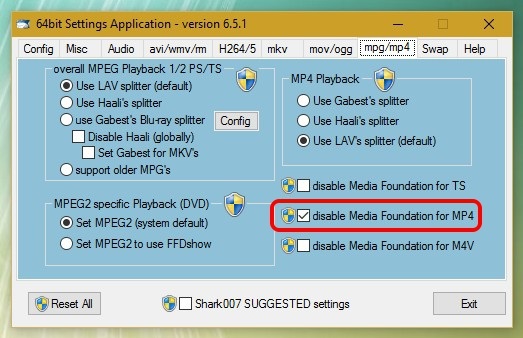
5. When the awarding opens, become to the tabs of different video file types and check the option that says "disable Media Foundation for MP4/AVI/MKV etc..). Also, head to the "Swap" tab and check "disable Windows Media Foundation".
After y'all are done with the aforementioned steps, you can simply open a video file in Windows Media Player and you should see the subtitles working fine. If they yet don't work, there might be some problem with the subtitle file. In that example, effort irresolute its file name from .srt to .sub. Nosotros have tested the process, so we are sure of its working.

SEE ALSO: ii Best Ways To Add Subtitles To A Moving-picture show On Android
Ready to spotter videos with subtitles in Windows Media Player?
Well, that's how you tin can add subtitles in Windows Media Player. Nosotros certainly call up that Microsoft should have worked on better external subtitle back up in Windows Media Player but nosotros don't see that happening. Thankfully, the aforementioned style to add subtitles in Windows Media Thespian works flawlessly on Windows x likewise equally previous iterations of Windows. So, try it out on your Windows PC or laptop and let us know if you come across any roadblocks. Audio off in the comments section below.

Source: https://beebom.com/how-add-subtitles-windows-media-player/
Posted by: blossstrable.blogspot.com
0 Response to "How to Add Subtitles in Windows Media Player"
Post a Comment